API keys allow external tools — like our Gmail extension — to connect securely to your Odoo instance without using your password. The process to create one varies slightly depending on your Odoo version. This guide covers every version from Odoo 14 to 19 with step-by-step instructions.
1 Before You Begin
Before creating an API key, make sure you meet these requirements:
- You must be logged in to your Odoo instance
- You need an internal user account (not a portal user)
- You should know which Odoo version you are using
To check your Odoo version, look at the bottom of the Settings page or ask your system administrator.
2 Odoo 14-15
In Odoo 14 and 15, API keys are found under the "Developer API Keys" section in your user preferences.
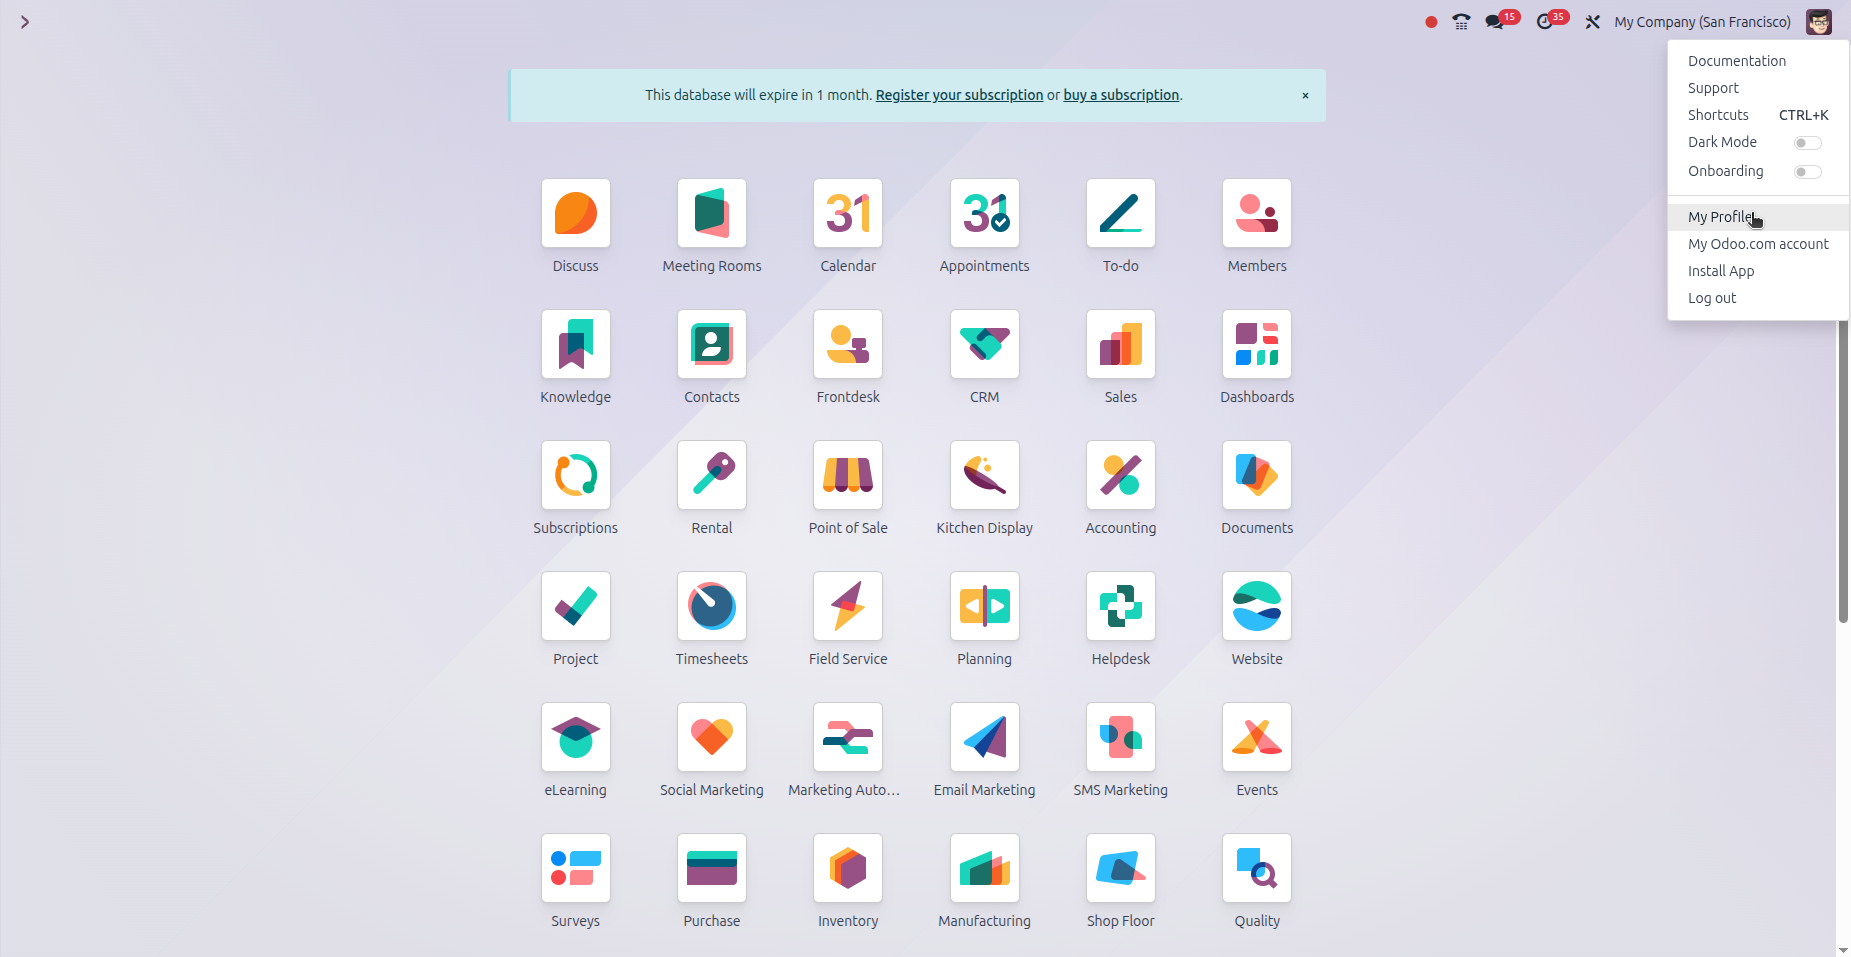
Navigate to: Profile icon (top right) → My Profile → Account Security tab
- Click "New API Key"
- Enter a name for your key (e.g., "Gmail Extension")
- Click the confirmation button
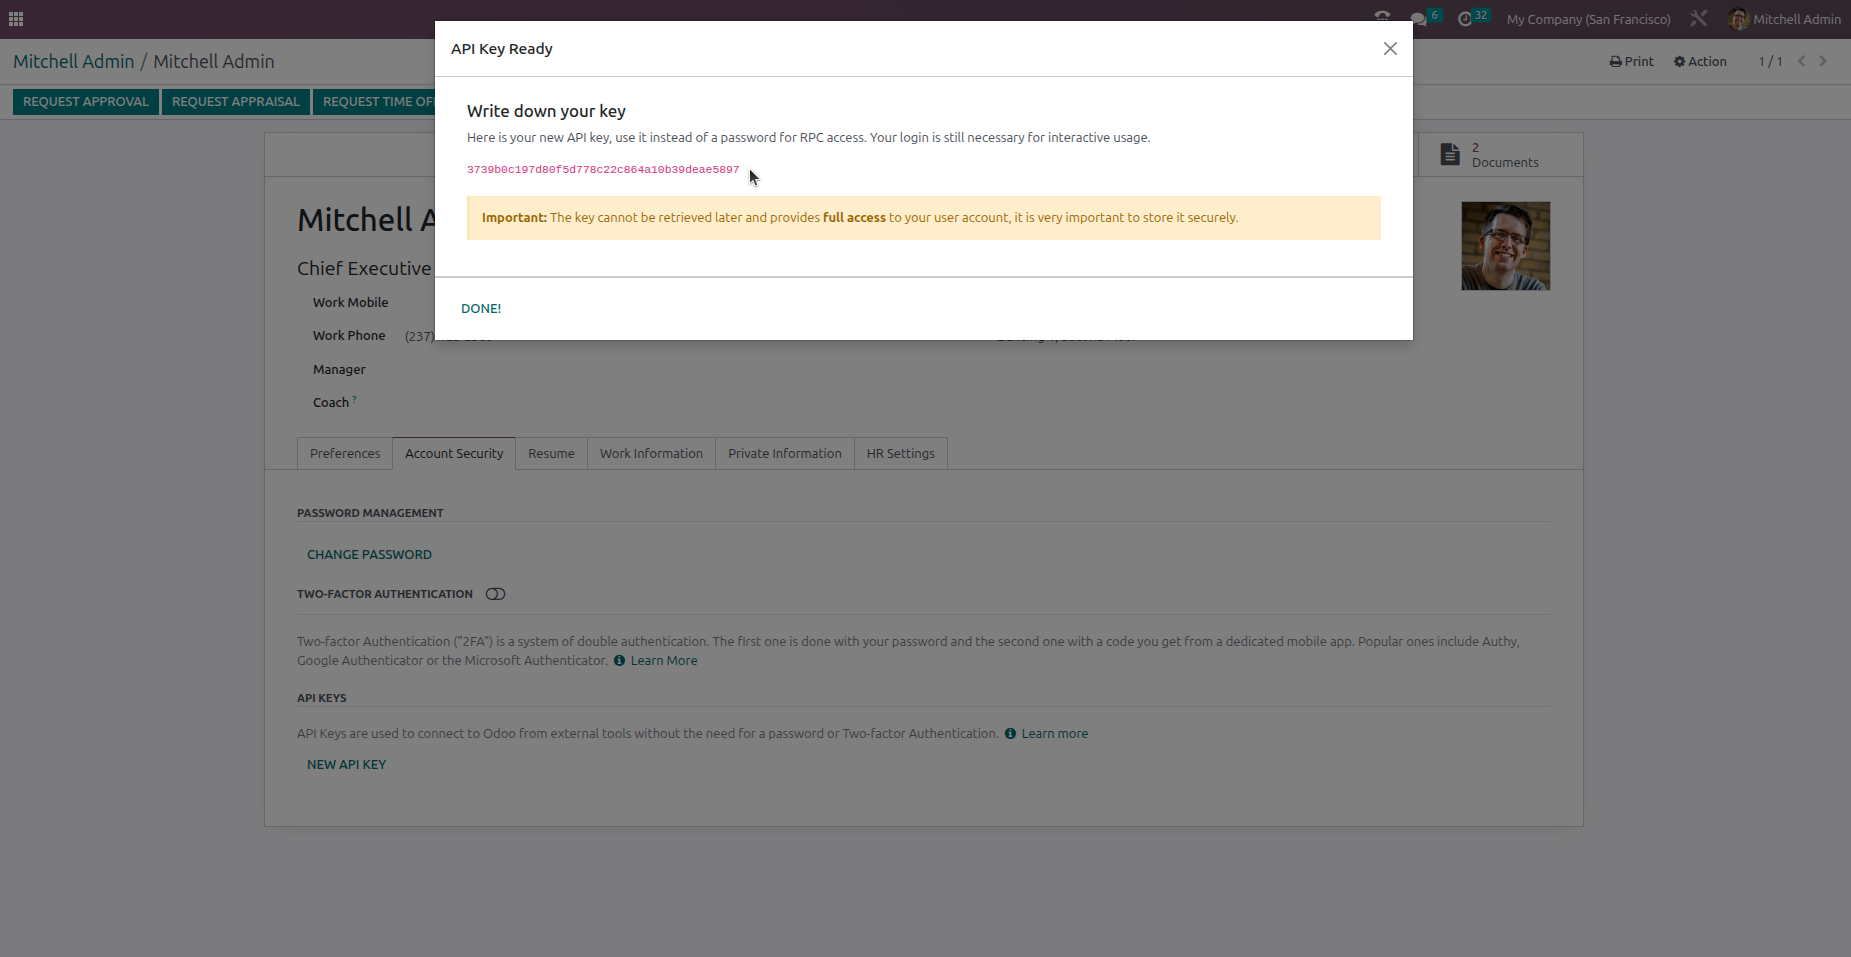
- Copy the generated key immediately — it cannot be retrieved later
In these versions, API keys are permanent — they never expire.
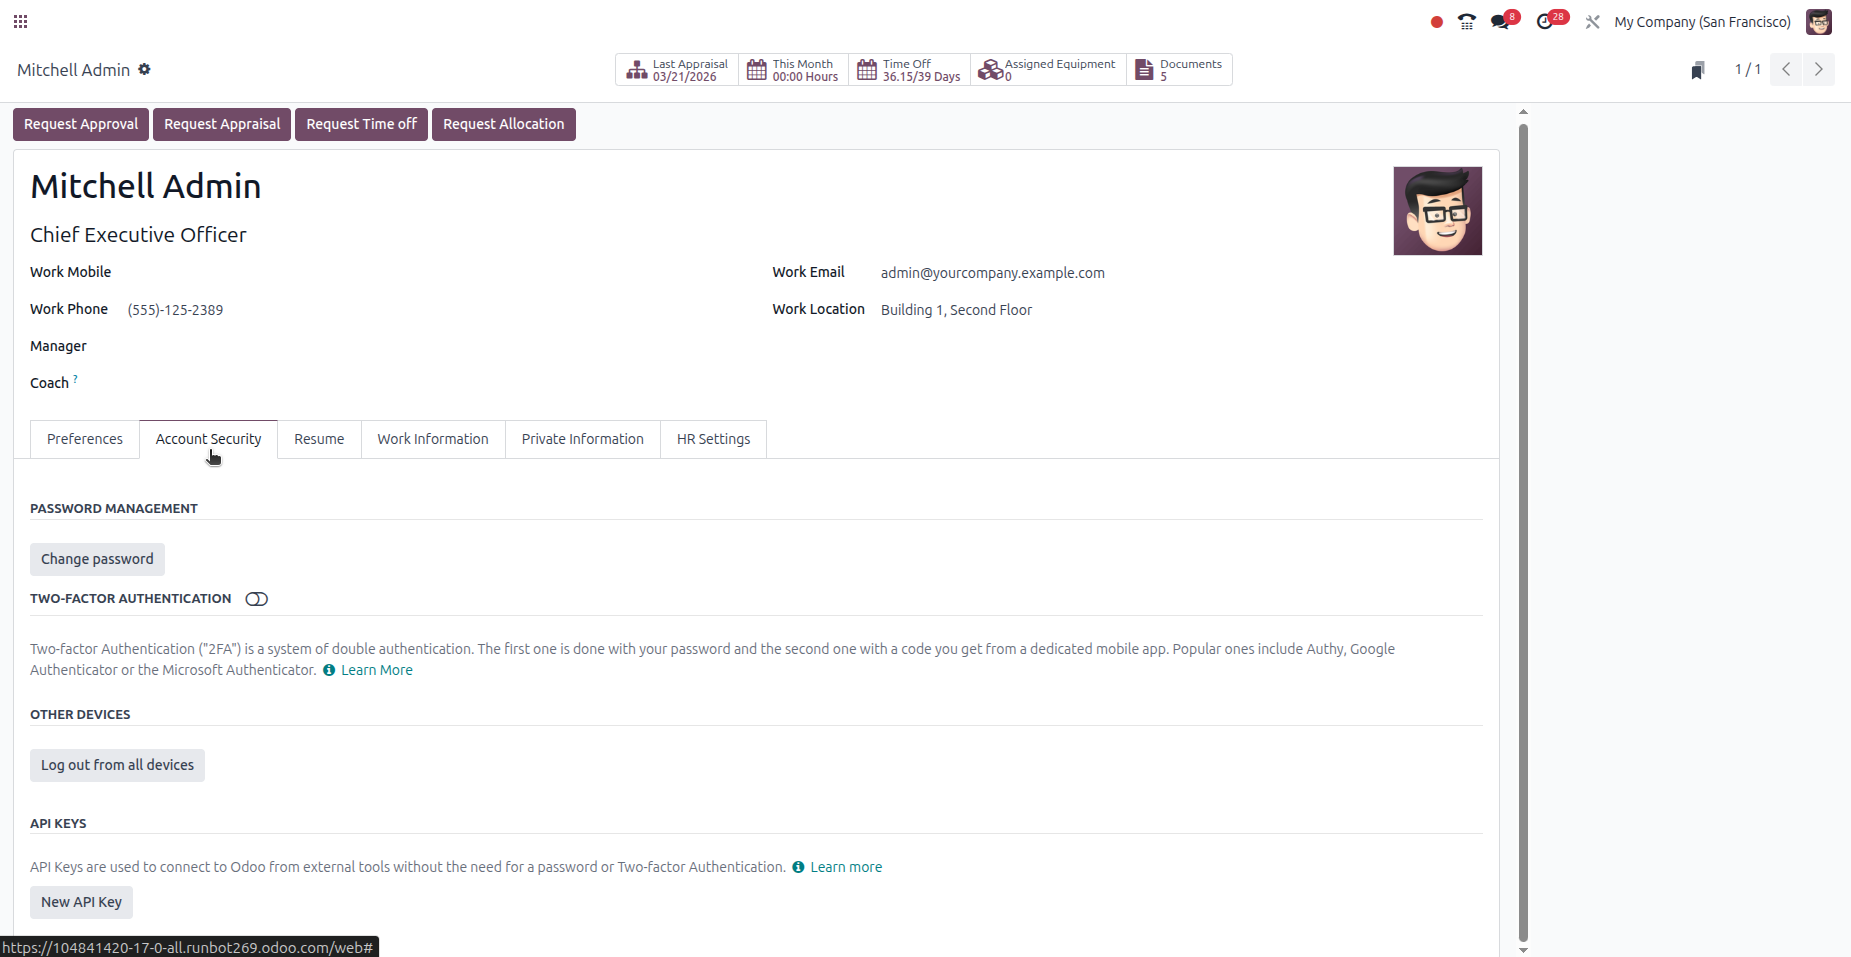
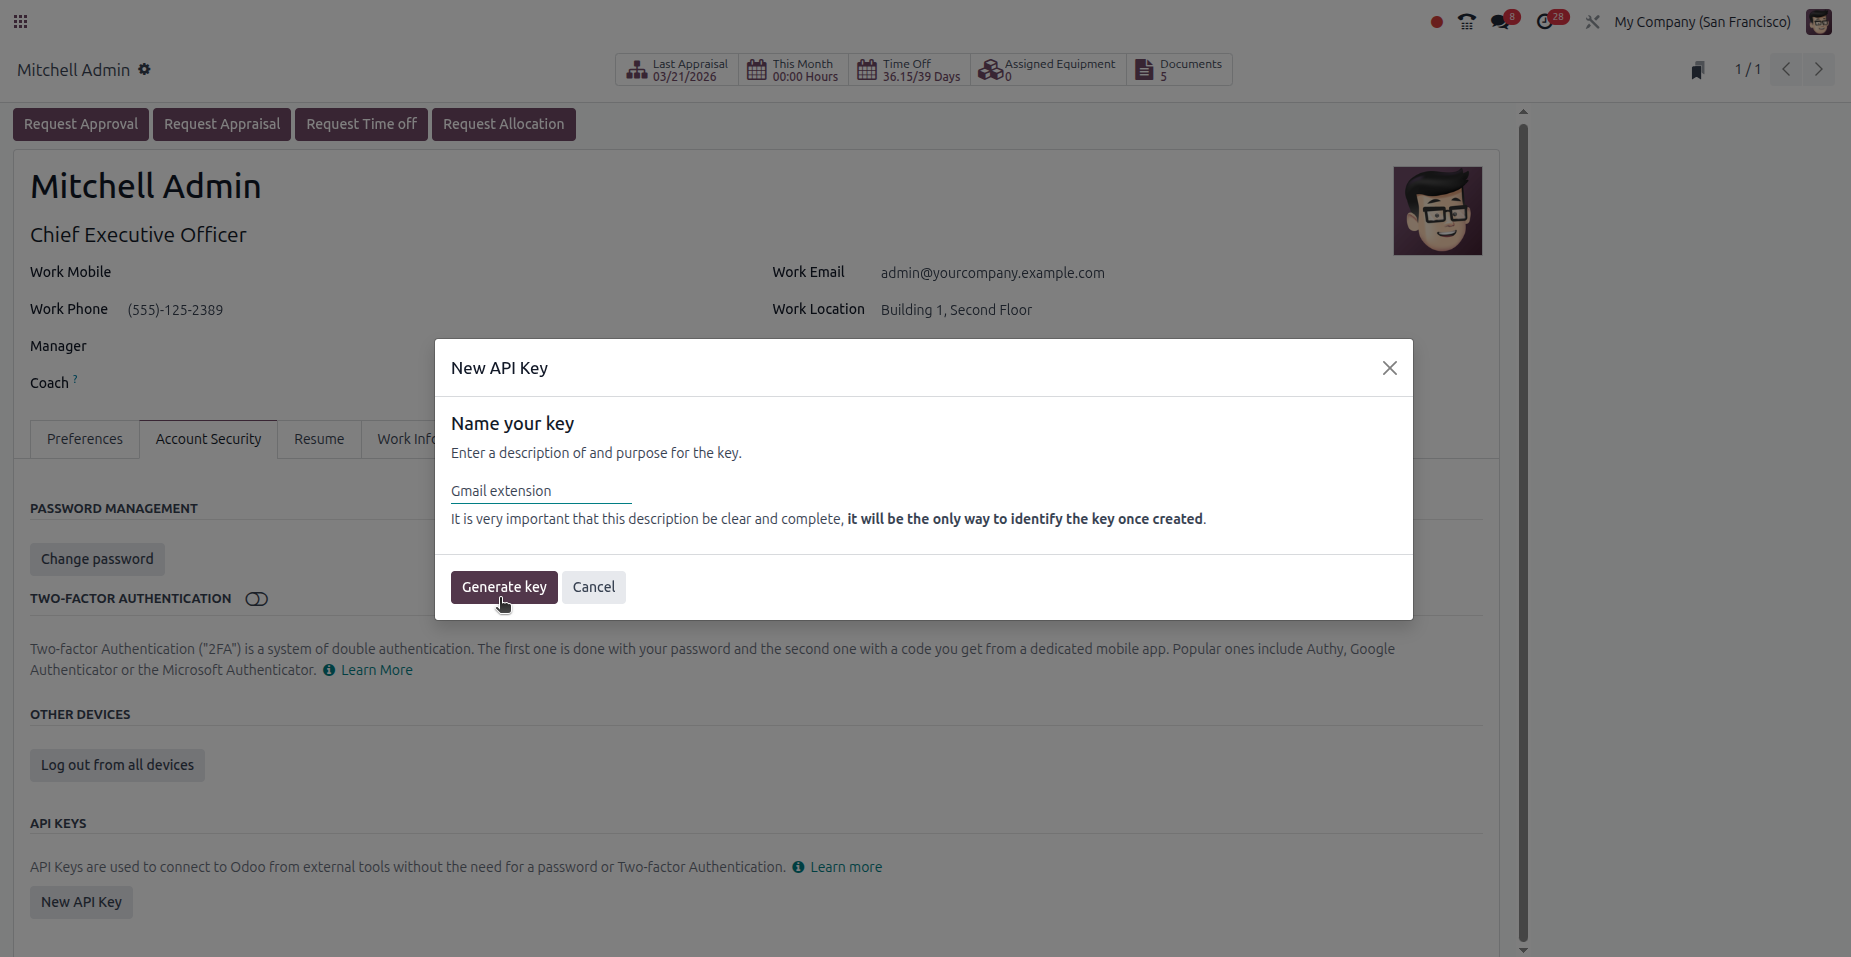
3 Odoo 16-17
Starting from Odoo 16, the API Keys section was renamed and no longer requires Developer Mode.
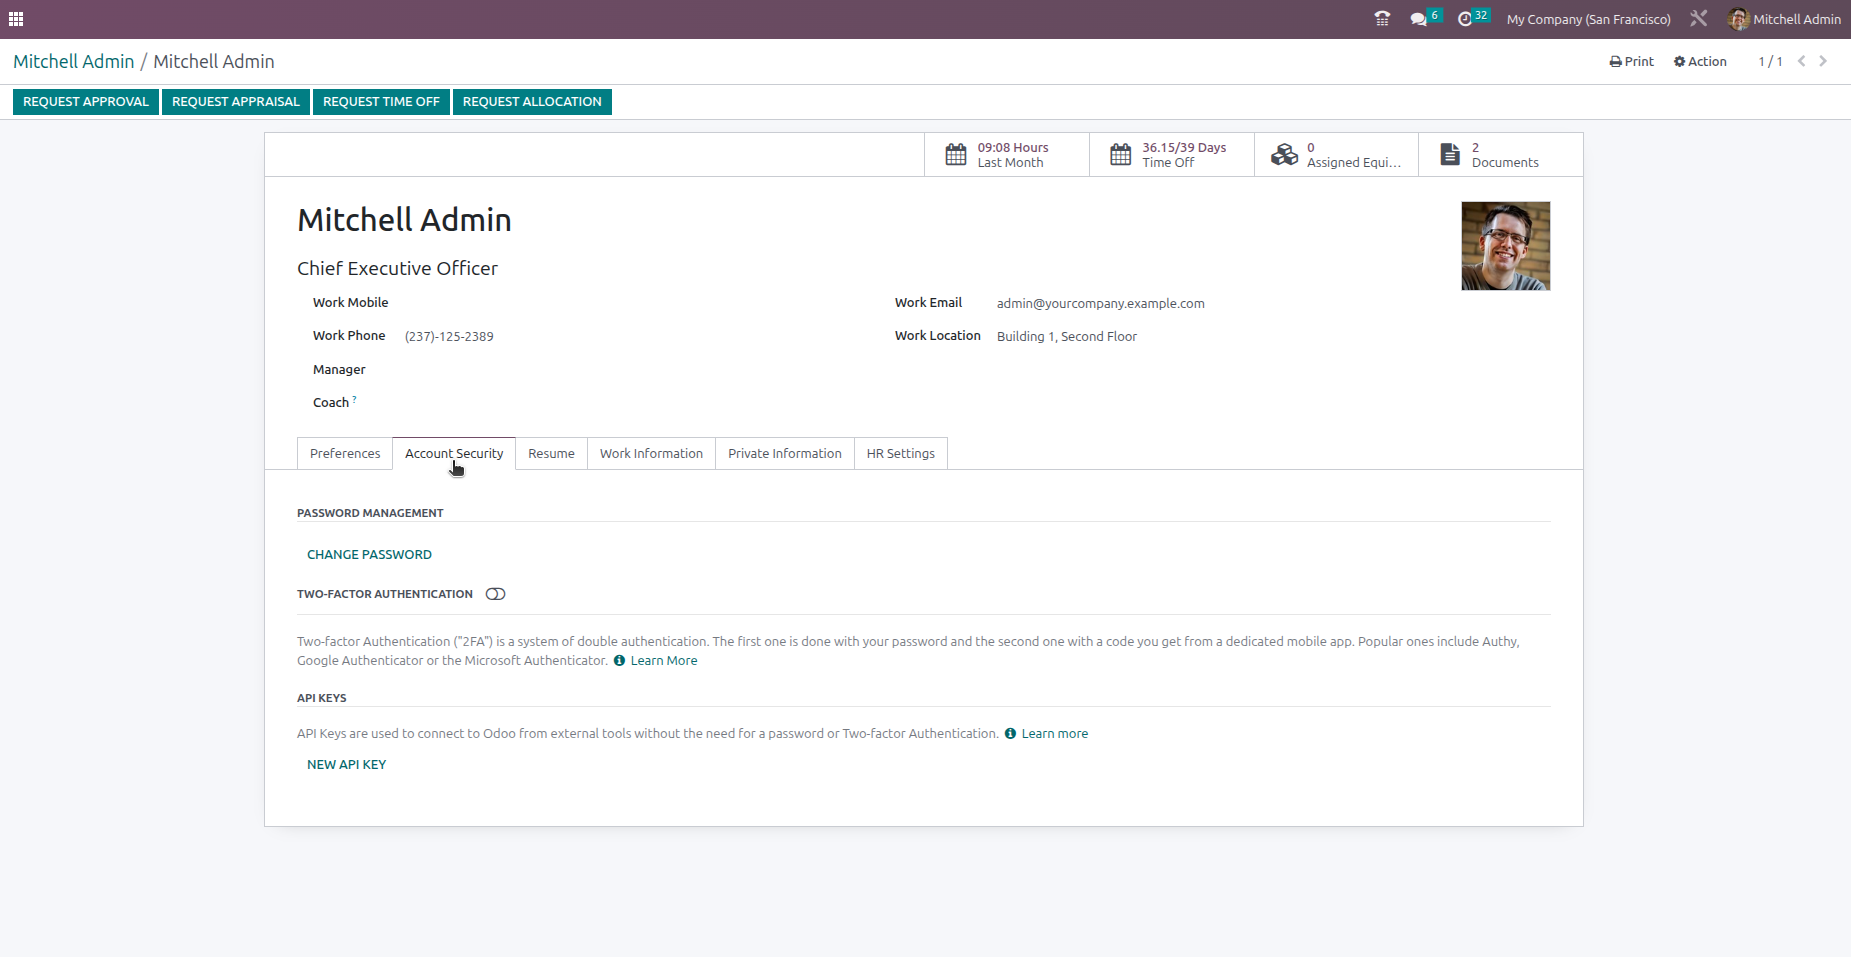
Navigate to: Profile icon (top right) → My Profile → Account Security tab
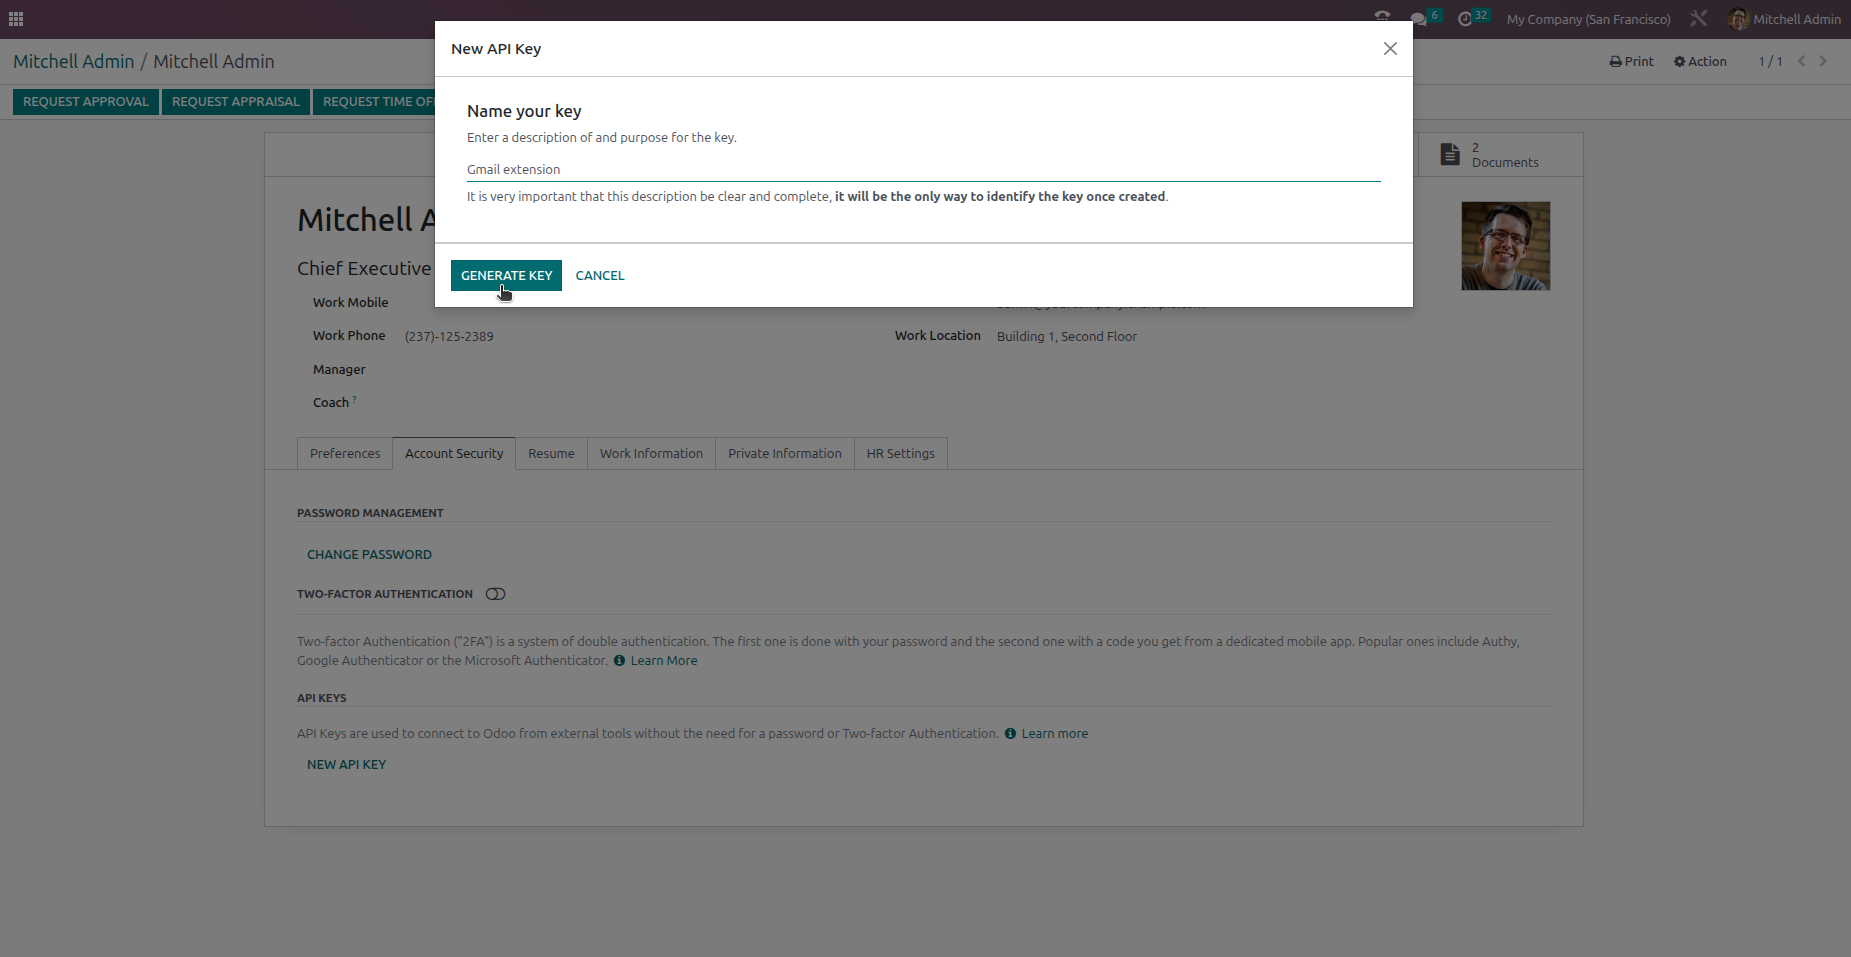
- Click "New API Key"
- Enter a name for your key (e.g., "Gmail Extension")
- Click the confirmation button
- Copy the generated key immediately — it cannot be retrieved later
API keys in Odoo 16-17 are permanent — they never expire.
Odoo 16
Odoo 17

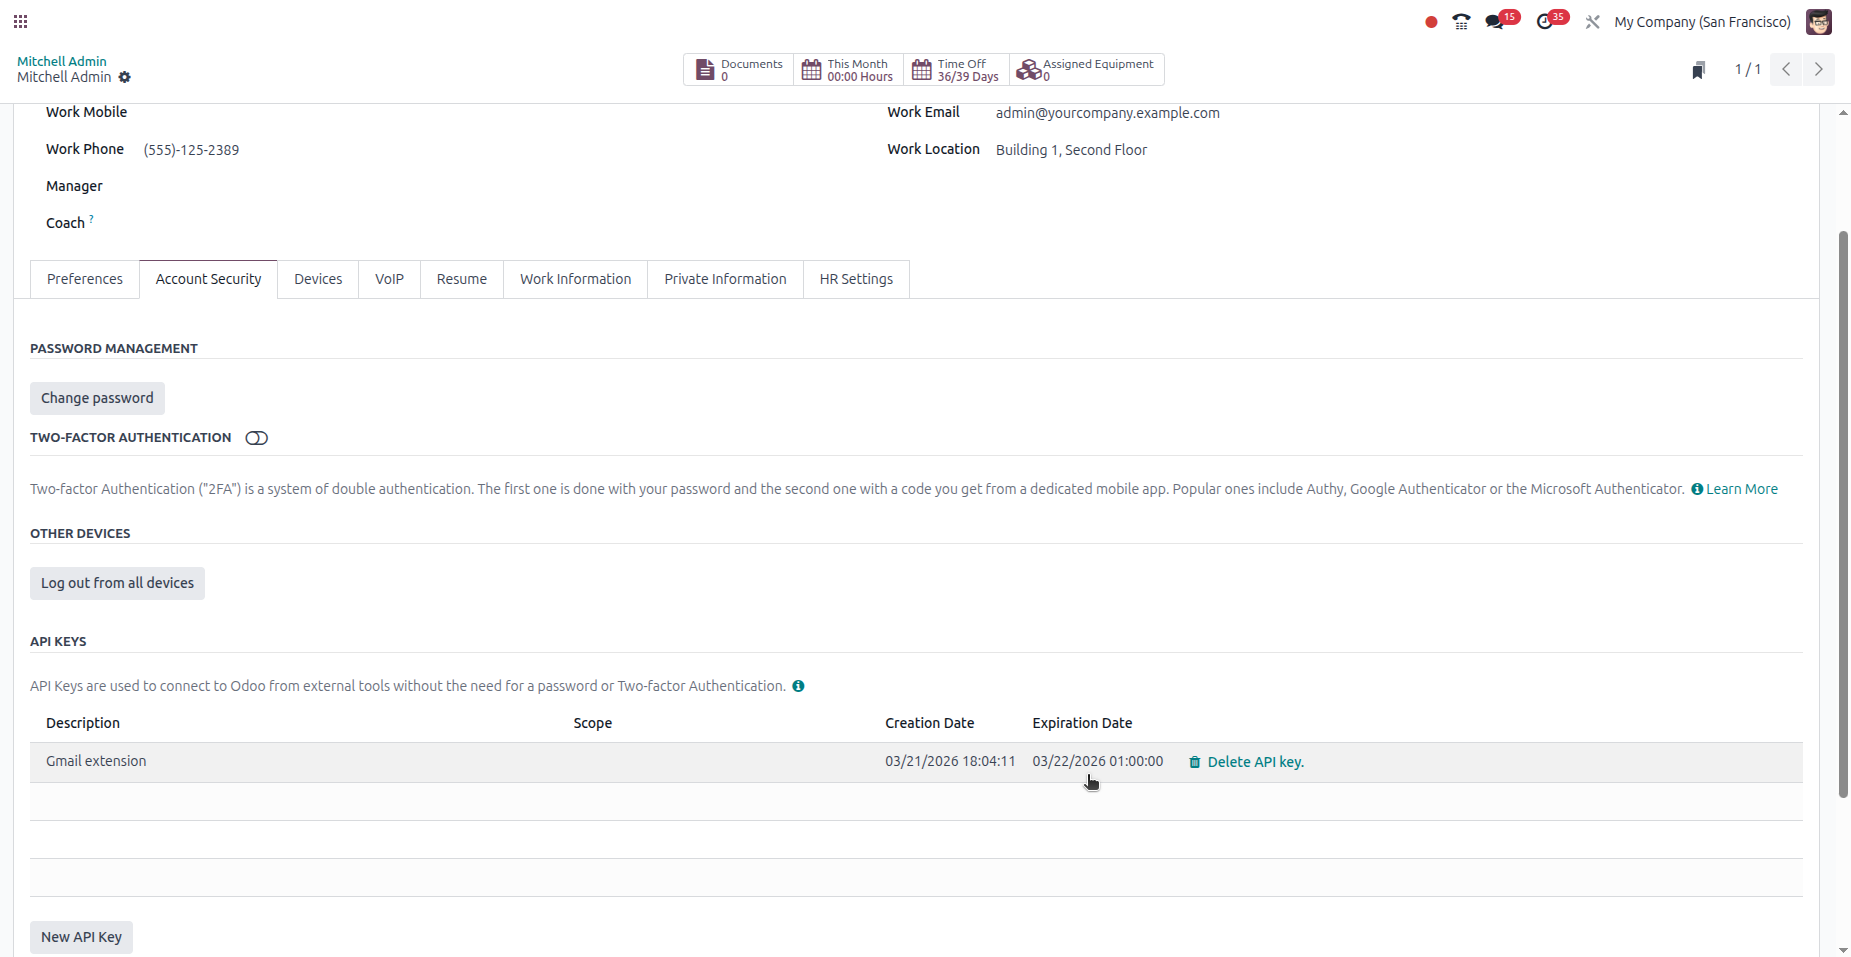
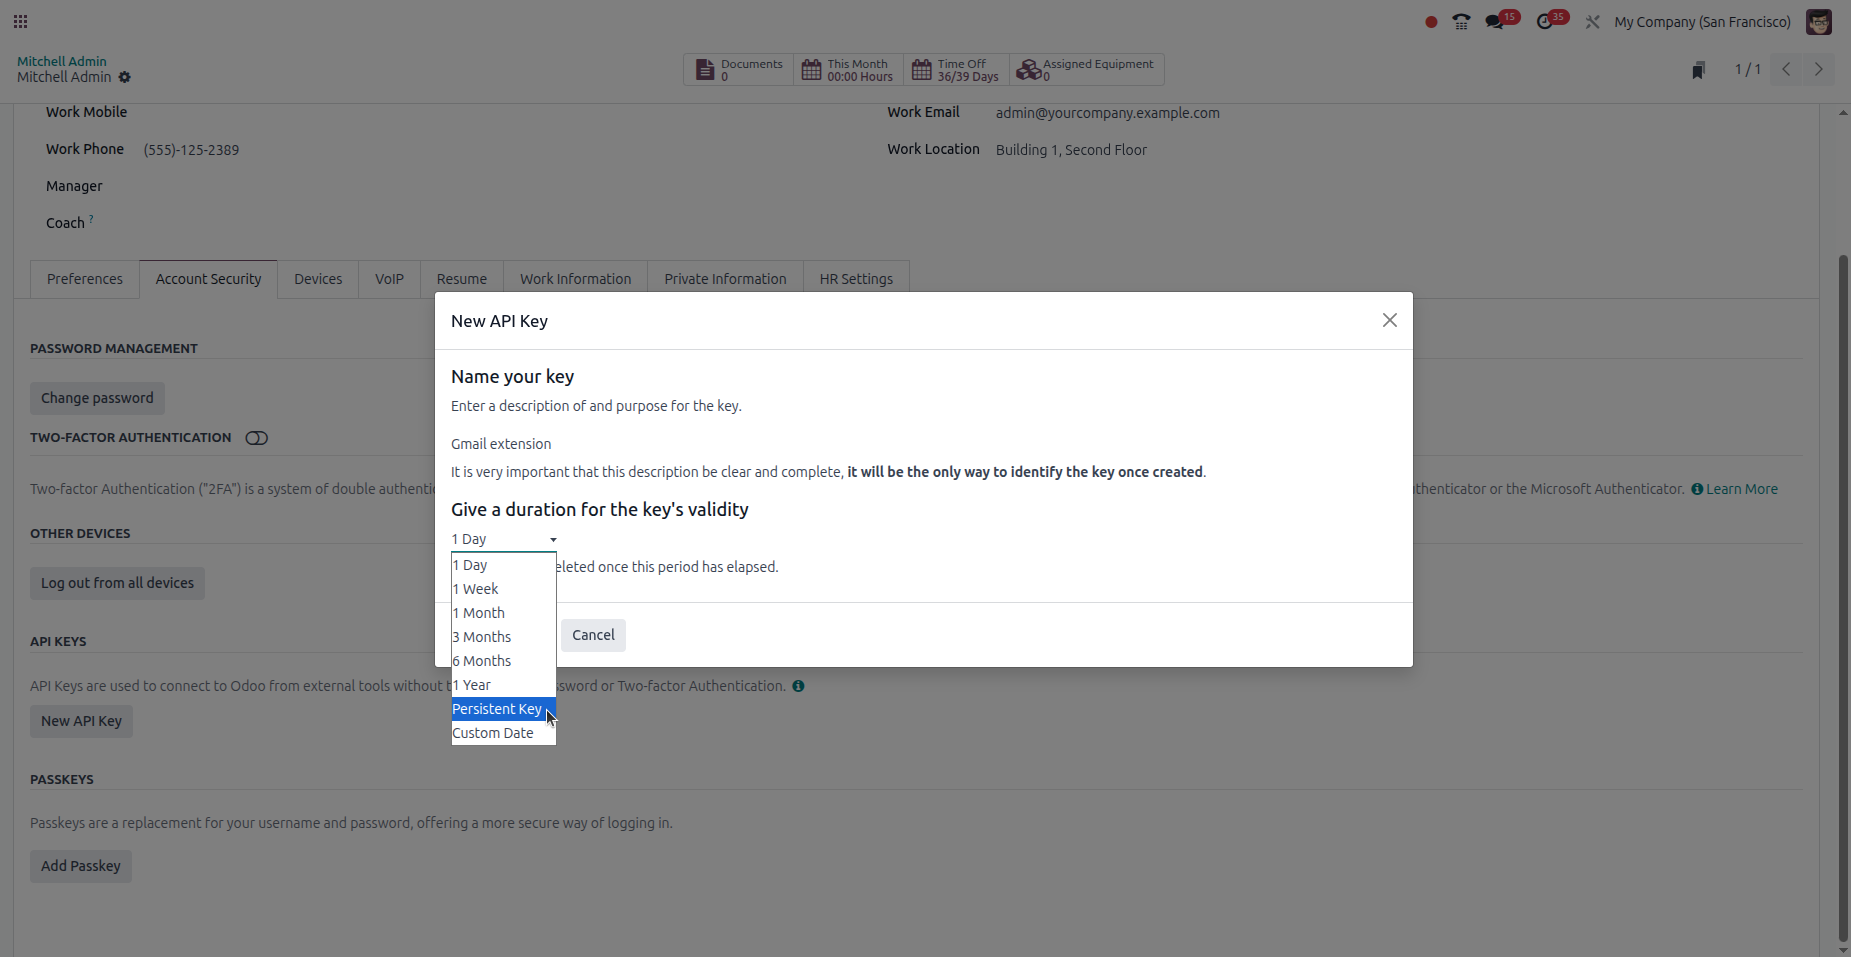
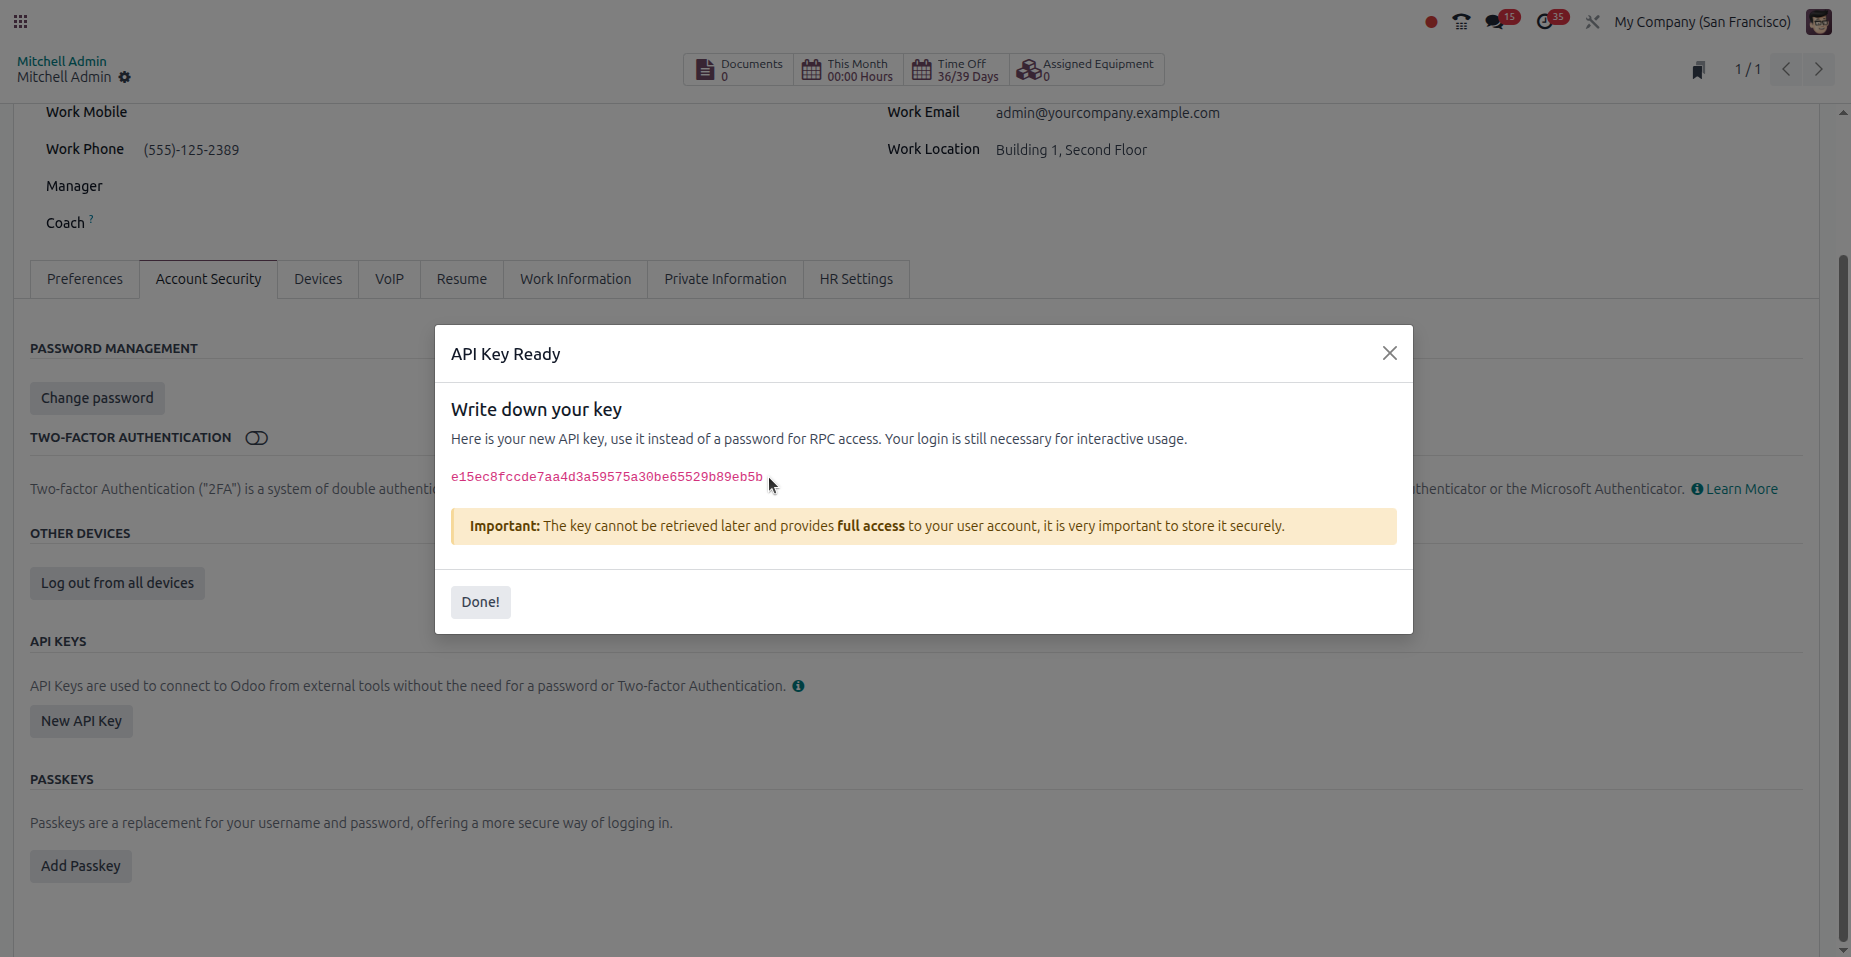
4 Odoo 18
Odoo 18 introduces key expiration. When creating an API key, you must choose how long it will be valid.
Navigate to: Profile icon (top right) → My Profile → Account Security tab
- Click "New API Key"
- Enter a name for your key (e.g., "Gmail Extension")
- In the duration selector, choose "Persistent Key"
- Click "Generate key"
- Copy the generated key immediately — it cannot be retrieved later
5 Odoo 19+
Odoo 19 redesigned the user preferences interface. The path and button names have changed, but the process is similar to Odoo 18.
Navigate to: Profile icon (top right) → My Preferences → Security tab
- Click "Add API Key"
- Enter a name for your key (e.g., "Gmail Extension")
- In the duration selector, choose "Persistent Key"
- Click "Generate key"
- Copy the generated key immediately — it cannot be retrieved later
In Odoo 19, existing API keys are displayed as cards (kanban view) instead of a list.


6 Quick Reference
| Version | Path | Button | Dev Mode | Expiration |
|---|---|---|---|---|
| Odoo 14 | My Profile → Account Security | New API Key | No | Permanent |
| Odoo 15 | My Profile → Account Security | New API Key | Yes | Permanent |
| Odoo 16-17 | My Profile → Account Security | New API Key | No | Permanent |
| Odoo 18 | My Profile → Account Security | New API Key | No | Must select "Persistent" |
| Odoo 19+ | My Preferences → Security | Add API Key | No | Must select "Persistent" |
7 Troubleshooting
"Invalid API Key" error
Double-check that you copied the entire key without extra spaces. If using Odoo 18+, make sure the key hasn't expired — create a new one with "Persistent Key" selected.
"API Key expired"
This happens in Odoo 18+ when the key was created without selecting "Persistent Key". Create a new key and select "Persistent Key" as the duration.
Can't find the API Key button
In Odoo 15, you need to activate Developer Mode first (Settings → Developer Tools → Activate). In Odoo 19+, the section moved to My Preferences → Security (not Account Security).
"Connection timeout" error
Verify that your Odoo URL is correct and accessible. Make sure to include https:// and remove any trailing slash.
Ready to connect?
Now that you have your API key, install the extension and connect your Odoo instance to Gmail in seconds.
Get the Extension